Epic Protein Brownies

Today is an epic day. I Jordan McHenry, slept in, made something for breakfast other than pancakes, and am actually posting on my blog. Insert Harry Potter quote* “Ive waited 13yrs” XD sorry if you feel this way waiting for me to get back onto my blog!

protein brownie top shot

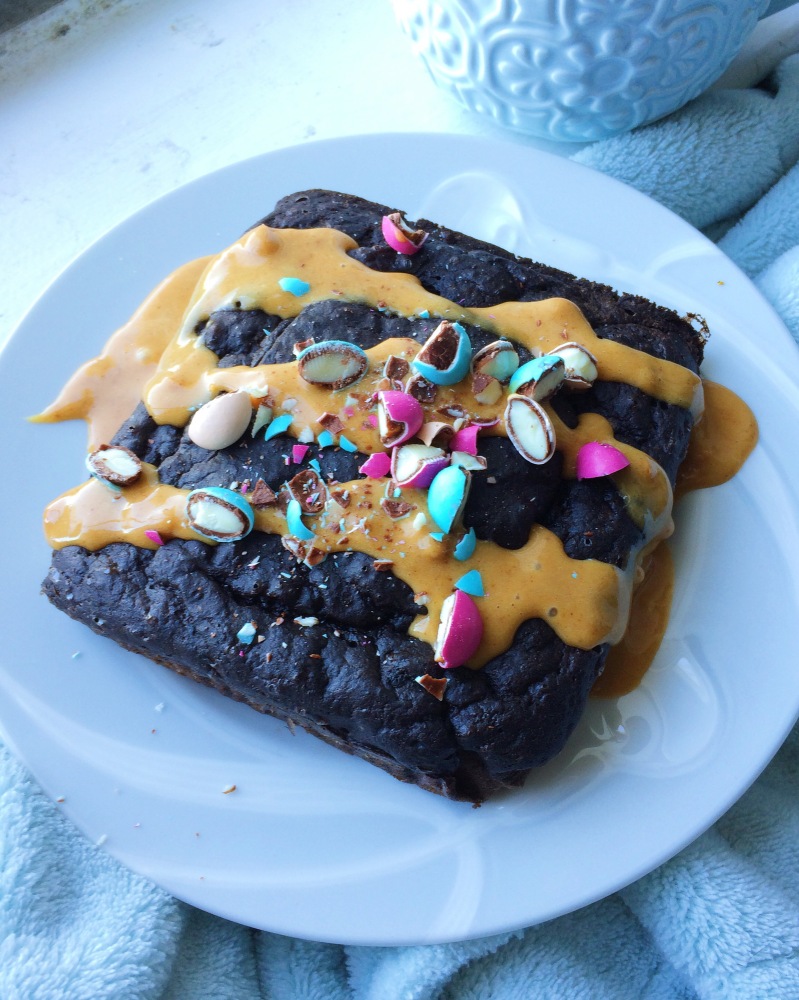
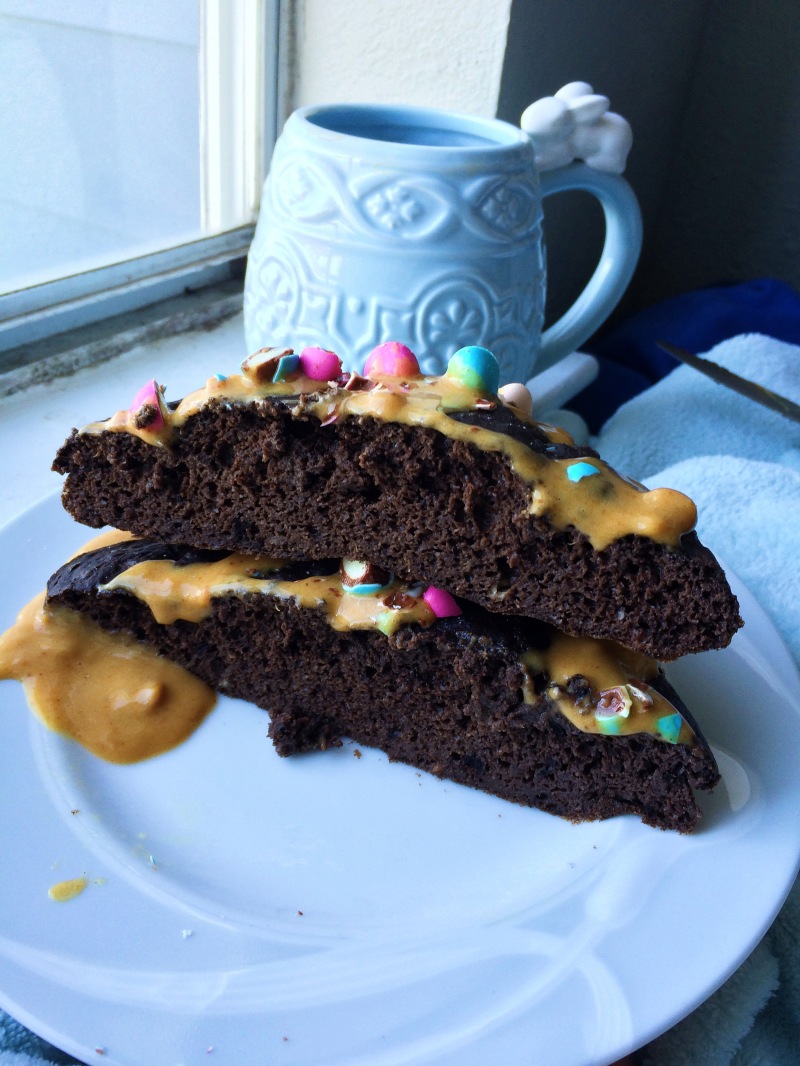
Anyway, I was just so shocked by how delicious, tender and mousslike this protein brownie was that I knew at once it was destined to be immortalized in internet recipe glory ( I also wanted to be able to find it easily to make again haha!)

Pros of this recipe: The ingredients are simple and easy to find, the macros absolutely rock, it tastes kinda like chilis molten lava cake base, wait seriously? Yes. Make this.

Processed with VSCO with f2 preset

Mind blowing Brownies

Ingredients:

1/2C (92g) liquid eg gwhites

1/4c (60g) pumpkin puree

1 scant Tbs (15g) unsweetened applesauce

2tbs (10g) Dark coco powder

2Tbs (20g) Oat flour

½ scoop (16g) Chocolate protein powder of choice*

1/2tsp baking powder

2 Heaping tbs granulated stevia (or sugar of choice)

3tbs sf mocha skinny syrup*

Method:

Mix all ingredients together in a bowl (wet to dry) until well incorporated) batter should not be so thick it cannot be poured. Pour into a well-greased 4×4 inch baking ramekin and pop in the oven at 350deg for 20-25min or until the center has risen and set.

Top to your heart’s desire ❤

Macros for entire brownie without the toppings:

252 Calories, 28g Carb, 4g Fat, 25g Protein, ( 8g Fiber, 4g Sugar, mainly a source of vitamin A)

Ingredients Notes:

*I used a blend of Lean body for her chocolate and BPI chocolate cookie because I needed to finish them off, depending on the flavor quality of your chocolate protein this could affect the brownies flavor just saying, the lean body for her chocolate powder is one of the best tasting chocolate proteins I have ever had it just doesn’t have the best macros. It is also a whey/casein blend which in my experience bakes much better than pure whey proteins. Less drying.

*If you do not have a sf or non sugar free (too each its own) chocolate or mocha flavored syrup understand this: I use this syrup in place of water and for extra flavor, therefore, if you are going to sub it you must understand that a substitution must be a liquid and you will also need to up the sweetness somehow for the same flavor to occur. I suggest maybe using coffee and some extra chocolate stevia drops if available. J syrup from home goods for $4

Green Tea Cupcakes

Processed with VSCOcam with f2 preset

Long time no see blogging world! Sorry, I got a little behind on uploading posts and recipes with all that’s been going on. Somehow spring always turns into the most convoluted season in my life. Maybe it has to do with finals, or all the impending due dates for my next collage semester, or it could be the pressure to find a summer job… I’m leaning towards a combination of all three plus multiple other to-do’s XD I think you get the picture lol I have been a little crazy. Thankfully things are starting to fall into place and that rampant feeling of fight or flight is being replaced by a calm sense of peace. I give all the credit to the good lord for following through and answering my prayers. He must of just been shaking his head up in heaven watching me put myself through such unnecessary turmoil, after all, he’s the man making the plans!!

Processed with VSCOcam with f2 preset

This Sunday I managed to escape to my happy place again and thankfully the baking gift accompanied me! I turned out these beautiful Matcha green tea cupcakes with a delicate airy crumb and sweet vanilla essence with surprising ease! The recipe is simple and you probably have most ingredients on hand! I literally could not believe how “cupcake like” these babies turned out! Especially when topped off with a healthy dollop of buttercream frosting ( or should I saw cashew frosting?! An AMAZING substitution!) Top it with sprinkles and I bet my bottom dollar any child would be BEGGING for a bite! I know I would especially because they are green and who doesn’t love fun colored food? They even pack a sneaky punch of kale adding lots of nutrition to your normally empty cupcake. The recipe makes 10 cupcakes and enough frosting for the whole batch. I even decided to fill some with a homemade raspberry chia jam!

Processed with VSCOcam with f2 preset

Thank you for your patience and I hope you enjoy this delightfully spring tinged recipe!

                                                                                   Green Tea Cupcakes

Dry:
1/2c stevia
2tsp baking pwd
1tsp soda
1 heaping tsp matcha powder
1 heaping tsp kale powder
2tbs (14g) coconut flour
1/2c (80g) oat flour
1 scoop (40g) vanilla protein powder

Wet:
Cake batter emulsion extract 1 drop
1/4tsp Dash butter extract
1/4c (57g) applesauce 57g
6tbs (92g) egg whites
1/2c almond milk

Mix all dry ingredients and wet ingredients in separate bowls. Pour dry into wet and mix well. Pour batter into 10 cupcake liners.

Bake at 350 for 15-20min, or until tops have risen and browned

Frosting:
1/2c (70g) cashews
1/4-1/2c water
2-4tbs sf vanilla syrup

Soak cashews inside a food processor with just enough water to cover them for 10-20hrs (liquid should be practically gone) add 2-4tbs sf vanilla syrup and process till smooth.

**Optional filling**
Raspberry filling
1tbs chia seeds
1/2c fresh raspberries
Dash lemon juice
Stevia to taste

Mash/blitz all ingredient together and allow to sit until the chia seeds have absorbed the liquid.
Fill and frost cooled cupcakes

Processed with VSCOcam with f2 preset

Nutrition for 1 cupcake:108 calories 4.7g Fat, 9.4g Carb, 7g Protein

Tresimisu

On the days where life seems unfair and overcast I find it best to immerse yourself in whatever makes you happy. For me that means two things: Working my worries away at the gym and losing track of time in the kitchen. Whenever things seem out of control I can always count on the steady feel of weights in my hands and the thrumming pace of a whisk through batter. The feeling of relaxation that passes through me is quite literally like a drug. These things center me, grounding me in a spinning life. No matter how crazy or hopeless I feel I can count on them to remain constant.

Today I retreated to both of my sanctuaries to escape the pressure of dark news. Unfortunately I can only share the fruits of my kitchen labor as I can’t invite you to the gym with me! (Well I can but transportation would be an issue haha). I decided to channel my anxious energies into creating a tiramisu inspired cake. I wanted it to be light and moist, dripping with cream just like the original. What evolved from my experiments was not quite tiramisu but yet satisfied the same craving! The cake was dense and moist with a delightful vanilla flavor and the caramel coffee sauce soaked succulently through each bite! Not to mention a serving is only 150cals and packs 17g Protein!!I was surprised in the most delicious way and will definitely be adding this to my nightly snack! I hope you enjoy this cake baked straight out of my happy place ❤

Processed with VSCOcam with f2 preset

Tresimisu

(or tres-leches/tiramisu crossover )

Sponge cake:

(3-4C) 400g cauliflower

1/2c Granulated stevia

2 scoops (84g) vanilla lean body for her protein*

2tsp vanilla ext

2tsp butter ext

1tsp cake and cookie bakery emulsion

¼ C+1tbs (40g) kamut flour*

6tbs (92g) egg whites

2tsp baking powder

1tsp baking soda

2tbs water

Method: Soften the cauliflower by sprinkling with water and microwaving till soft. About 1-1:30min. Combine all ingredients in a food processor (if yours is too small, process in two batches) and process till smooth. Pour into a well-greased 8×8 baking dish lined with parchment paper and bake for 20-25min. Remove and let cool.

Vanilla Cream:

¾ package (252g) mori nu silken lite tofu*

3tbs sugar free vanilla syrup*

½ Scoop (22g) vanilla lean body for her protein*

1tsp vanilla extract

1-2tsp xanthan gum

Method: In a blender or food processor combine all ingredients except the xanthan gum. Once smooth, add small amounts of xanthan gum until the mixture thickens. Set aside.

Coffee soaking sauce:

2tbs Brewed coffee

2tbs Walden Farms pancake syrup*(or regular maple syrup)

2tsp cinnamon

1tsp flavored coffee grinds ( I use the inside of a Keurig cup)

Method: Whisk ingredients together in a small bowl. Set aside.

Assembly

Once the cake has completely cooled, slice evenly through the center horizontally until you have two thin sheets of cake.

Take one sheet and lay it in the bottom of an 8×8 baking dish.

Brush the cake layer with half of the coffee soaking sauce. Allow to soak into the sponge for 1-2min.

Spread half of the vanilla cream evenly on top of bottom cake layer.

Repeat with the second cake layer, ending on the vanilla cream.

*Optional topping of more coffee grinds and 1tbs (14g) coco nibs*

Processed with VSCOcam with f2 preset

Serve!!

(Store in refrigerator, serves 6)

Nutrition for 1/6 of recipe including coco nibs: 152 Calories, 3g Fat, 14.2g Carb, 17g Protein

**Recipe Notes:

Any suggested substitutions will change the nutrition info!!

As usual feel free to substitute your own vanilla protein gram per gram

For the “vanilla cream” there are a multitude of options! I choose the tofu for the nutrition (1g fat, 5g Protein and 1g Carb per 84g) but you could also substitute: Greek yogurt, Ricotta cheese, or cottage cheese. The amount of sweetener and xanthan gum may need to be adjusted, trust your taste buds!

Kamut flour can be substituted with whole wheat flour, oat flour or any other mild light flour, again I choose this ingredients for the better nutrition profile.

Questions??? Feel free to comment!!!

Berry Amaretto Torte

Processed with VSCOcam with f2 preset

It has been far too long since my last post on Strongsteady. I let myself be swept up in the rituals of life. Preoccupied with the here and now and not taking the time to sit down and write. I hope you can forgive me for the lack of discipline the past few weeks. Sometimes life just moves to fast for my own good! I am going to try and remedy this, especially since I really enjoy creating lasting tangible moments through writing. Unlike my other hobby Instagram, this blog is more solid and layered. The posts are not fleeting blips in a feed they are lasting records of my culinary and spiritual exploits.

I am just now getting into the swing of my new schedule and have slowly seen a rise in the amount of moments I have to myself where I am not running around like a headless chicken. Today was one of those days. I managed to snag an hour in the kitchen alone and unhindered to roll up my sleeves and pour out some thoughts. I was rewarded with a fluffy sponge cake layered with tart strawberry jam and amaretto whip cream; a lite airy gift to bring spring rolling quickly in over the chill of winter. Now I know many of you are knee deep in snow at the moment but no I have not lost my marbles; it is a balmy 70 deg in North Texas right now so I believe I have the right to make a strawberry torte! Hopefully this refreshing dessert will banish the blizzard from the east coast!

Processed with VSCOcam with f2 preset

Berry Amaretto Torte

Vanilla sponge layer:

260g Cauliflower (roughly half a head)

14c (30g) coconut flour

2scoops (80g) vanilla lean body for her protein *

1/4c granulated Stevia

1.5tsp Baking powder

1tsp Baking soda

1/3c almond milk

1tsp butter extract

1tsp vanilla extract

1/8tsp bakery emulsion

6tbs (92g) liquid egg whites

Method: first break the cauliflower into bite sized chunks, place on a paper plate and sprinkle with water. Microwave for 1-2min or until tender. Once the cauliflower florets are tender place them inside a food processor with all wet ingredients and process till smooth. In a separate bowl combine all dry ingredients and whisk together. Pour the wet mixture into the dry mixture and mix until well incorporated. Pour into a well-greased 8×8 baking pan lined with parchment paper and Bake at 350 deg F for 25 min or until a knife inserted in the center comes out clean.

Set aside.

While the cake is cooling assemble the amaretto cream and tart berry filling.

Amaretto cream:

2 portions (168g or ½ of package) mori nu silken lite firm tofu

½ scoop (20g) Lean body for her vanilla protein*

½ teaspoon almond extract

½ tsp vanilla extract

1teaspoon stevia drops

Combine all ingredients in a food processor and blend till smooth. Pour into a bowl and set aside.

Tart berry filling:

½ c berries of choice ( I used ¼ c strawberries and ¼ c raspberries )

2tsp lemon juice

2-5 drops liquid stevia (dependent on sweetness of fruit)

1tbs walden farms blueberry syrup*

2tsp chia seeds

Combine all ingredients in a food processor and process till smooth. (you can also just mash together the ingredients but a food processor simplifies the process and ensures a smooth jam)

And finally; the assembly!

When the sponge layer has completely cooled take a bread knife and carefully slice the vanilla sponge through the middle hamburger bun style until you have two even halves. Remove the top half and begin spreading the berry filling over the freshly sliced cake. Once you have spread an even layer of jam across the cake, begin adding the amaretto cream layer. Cover the entire jam layer being careful not to mix layers or squish jam over the edge of the cake. Once you have successfully layered the fillings place the second half of the sponge cake on top and finish by frosting the top of the torte with the remaining amaretto cream. Garnish with fresh fruits

Processed with VSCOcam with f2 preset

Macros For sponge cake and completed cake:

For ¼ of sponge cake: 156 cals 13c 18p 3.6f

For ¼ of completed cake: 110cals 8.7c 12.7p 2.7f

(Please Note that changing ingredients such as protein powder or tofu brand will change the nutrition information)

*Recipe Notes:

The sponge layer is a very versatile low-carb protein cake! Feel free to experiment with different ways to prepare it besides this berry torte recipe.

I used Jamie Eason lean body for her brand vanilla protein which performs extremely well when baked. However feel free to substitute any vanilla protein just be sure to use the same gram ratio.

The Walden farms blueberry syrup just adds a smidge more flavor and sweetness to the jam filling; if you do not have this ingredient don’t freak out; you can omit it just fine! Make sure to adjust the sweetness to your preference because it will be affected without the addition of the syrup.

Cookies and Cream Muffins

Processed with VSCOcam with f2 preset

Mhmm who would have thought that using cauliflower in baked goods would be the key to the ultimate fluffy crumbly texture ever! I have utilized the powers of this diverse veggie twice in different chocolate cake forms to great success! Today I was really craving chocolate as usual and carbs (go figure) So I created healthy macro-friendly DELICIOUS cookies and cream muffins! Yeah, you can eat chocolate cupcakes as a serving of veggies. You’re welcome. ;D I used all natural chocolate whey protein powder, peppermint mocha skinny syrup and of course a cookies and cream quest bar in the making of these beuts. They came out airy and light with a rich chocolate persona. I have already had four out of the six the recipe makes….. No shame….

Cookies and Cream Muffins

6tbs (92g) egg whites
Roughly 1cup cauliflower florets
2tbs (10g) coco powder
1/3c (40g) oat flour
1tbs (7g) coconut flour
2tbs granulated stevia
1/4tsp each baking soda and powder
2/3 a scoop (30g) pro powder
2tbs almond milk
1/4c peppermint mocha skinny syrup
1tbs brewed coffee
1 cookies and cream quest bar
2tbs mallows (roughly 10g)

Combine all ingredients except for quest bar and mallows in a food processor. Pulse and blend roughly 5min or until as smooth as possible ( the cauliflower will be a little gritty but baked out)

Layering the chunks:
once smooth begin adding 1tbs of batter into the bottom of 6-7cupcake slots in a well greased cupcake pan. Sprinkle half the mallows and quest bar pieces over the first layer of batter. Proceed to cover the mallows and questies with the remaining batter until all batter is used. Sprinkle remaining mallows and quest bits over the top.

Bake at 350deg for 18-20min

Processed with VSCOcam with f2 preset

(Just look at how light and delicate that texture is umph!)

Macros for 1/6 of recipe:
9p 14c 2.5f and 115cals

*Recipe Notes:

I used Jordan’s skinny syrups brand of calorie free coffee flavorings to add sweetness and flavor in this recipe. You can find these syrups at home goods, koals and other miscellaneous stores. I highly recommend them for healthy baking. The quest bar and marshmallows are of course optional, you can add in whatever your heart desires!

Lastly I used a specific brand of chocolate protein powder, however if unavailable any other chocolate protein powder if measured in the same amount should substitute fine. (I have not tried it with any other protein brands)

Peppermint Cake Bars

Processed with VSCOcam with f2 preset

 Peppermint season is here! Full of mint chocolate kisses and white mocha wishes! Wow I’m cheesy sorry XD I can’t help it! I adore the soft sweetness of candy cane with a ribbon of warmth running through it; the sensation of melting into the chill flavor of red and white oblivion. To swim through rivers of vanilla spiked with a biting mint sensation! A truly spectacular peppermint treat! I lost myself in these candy land ventures to distract from the stress of life; it’s the only thing keeping me from the coo coo club recently. My kitchen has become my winter wonderland and each creation a little bite of holiday paradise.

Today’s triumphs are peppermint cake bars! They aren’t necessarily a cake nor a blondie hence the creation of cake bars 🙂 I was actually surprised by their airy texture as I was aiming for a thicker mouthful but honestly these are better! Lite and buttery with the perfect hint of peppermint chill.

Processed with VSCOcam with f2 preset

Dunking in coffee is a MUST and they are even healthy enough for breakfast!

Peppermint Cake Bars
Ingredients
2/3 can drained and rinsed garbanzo beans (170g)
2tbs coconut flour (15g)
1 scoop (42g) vanilla protein powder*
1/4c sugar free peppermint mocha syrup*
1/4tsp baking powder
1/4tsp baking soda
1tsp vanilla extract
3tbs egg whites (46g)
1tbs granulated stevia (optional for extra sweetness)
Drop peppermint extract
Drop butter extract
2tbs peppermint m&ms

Method:
Combine all ingredients except for the m&ms in a food processor and process till smooth. Pour the batter evenly into the bottom of a well-greased 4 by 9 loaf pan (or other pan of choice). Bake at 350deg F for 20min, now remove from oven and carefully poke the m&ms onto the top. Return to oven and bake for 5-10min or until golden brown and cooked through.

Processed with VSCOcam with f2 preset


Macros per 1/4 of recipe (without m&ms):
105 calories, 11.5g carb, 10.5g protein, 1.8g fat

*notes: I used lean body for her vanilla whey which baked very well! Feel free to experiment with your own protein powder but the nutrition info will change! I also used skinny syrups peppermint mocha sugar free syrup however since not everyone has these a possible substitution could be lite maple syrup with added mint extract.

Egg Nog Pound Cake

Egg Nog pound cake

My love for egg nog in the holiday season knows no bounds. If I became president my first order of business would be to demand yearlong supplies of the delicious creamy nectar. I first became acquainted with its spiced creamy essence as a child snuggled up on holiday evenings sipping mugs of nog whilst watching Christmas specials. For me this is one of the few moments of the year where I truly feel the holiday spirit. When I was in the midst of my eating disorder I let this delicious treat slide from my grasp and only enjoyed it accompanied by copious amounts of guilt. This year will be different; I will indulge in a mug of holiday cheer without any remorse 🙂 because I am counting memories not calories. One full mug of cream and sugar will not set me back or strike me with obesity. An unhealthy lifestyle will, but balance between physical and mental health means not depriving my body of simple pleasures. So I will enjoy my full fat sugary egg nog coma and then wake up every morning to a steaming slice of healthy egg nog pound cake! Raise your mug of nog to a balanced and healthy holiday season; free from disordered thoughts and brimming with cherished memories.

Processed with VSCOcam with f2 preset

Egg nog pound cake

*with optional peppermint variation which I obviously opted for

Cuz der; peppermint XD

1/3c oat flour (40g)

4tbs coconut flour (30g)

1 scoop lean body for her vanilla whey (42g)*

1/2c granulated stevia

1tsp baking powder

1/2tsp baking soda

1/2tsp nutmeg

Pinch salt or sodium free salt

1/4c 1tbs low fat sour cream (75g)

3/4c Califia brand eggnog almond milk*

8tbs liquid egg whites (115g)

1/4tsp butter extract

1/4tsp rum extract

1/4tsp sweet leaf eggnog stevia drops

2tbs peppermint baking chips (22g)(optional)

Red food dye or beet juice(optional)

Method: in a bowl combine all dry ingredients together except for the peppermint baking chips. Once combined add in all the wet ingredients saving the almond milk for last. Slowly add in almond milk until the batter has reached a pourable yet still thick consistency. Once well combined fold in the peppermint chips until evenly dispersed. Finally spread the batter in a loaf pan lined with parchment paper and bake at 350deg F for 25-30min. (The top will be browned)

Processed with VSCOcam with f2 preset

Ahhh Beautiful ❤

Let sit in the pan for 1min before removing. Place on a cooling rack to finish cooling.

Frosting: 1oz fat free cream cheese, 1 tablespoon greak yogurt, eggnog stevia to sweeten (adjust ingredients as needed to reach desired amount and flavor)

DEVOUR with more eggnog of course.

Processed with VSCOcam with f2 preset

Macros for 1/8 of loaf(*frosting not included!!): 100calories 10.6g carb 3.2g fat 7g protein

 Processed with VSCOcam with f2 preset

*Notes: I used Jamie Eason’s lean body for her whey protein. With great results! It did not come out dry or add an off flavor. Substitute any other vanilla whey you desire but I cannot vouch for baking ability or nutrition info.

*I used califia brand eggnog brand with great success! I would recommend substituting a low fat eggnog as the califia brand version is fairly light in texture. Or substitute 1.5c vanilla almond milk with 1/4-1/2tsp more eggnog stevia drops.

Cream Cheese Coffee cake

Cream cheese coffee cake

In the past week I have made three different variations of “coffee cake”. You could say I’m on a coffee cake kick, or maybe I’m just determined to recreate the PERFECT dense buttery fluffy crumb through the intricate chemistry of guess and check. Guess what ingredient will work, bake it, eat-er I mean check, try again. So far I haven’t hit the flavor texture combo of my dreams but each variation I create has a special delicious twist to it! It is like playing an exciting game to discover all the different delicious ways to fail (in a good way!)

This is the strangest textured coffee cake I have made to date. It is not fluffy and soft like a cake nor is it smooth like cheesecake. I guess it’s a complete mixture of the two?? Still absolutely delicious! Fluffy like a cake and thicker through the bite from the cream cheese with a luscious cinnamon sugar swirl dancing through the middle. ❤ This is the second time I have experimented with fat free cream cheese in baking and although it is not necessarily the outcome I wanted, it was airy, light and absolutely divine served cold. Give your mornings a sweet kick start or finish your day on a bite if bliss! After all it’s good for you!

Processed with VSCOcam with f2 preset     \

Cream cheese coffee cake

2tbs coconut flour (15g)

1tbs spelt flour (15g)

2tbs granulated stevia

1 scoop lean body for her vanilla whey (42g)*

1/2tsp baking soda

1/2tsp baking powder

1/2tsp cream of Tatar

1tsp vanilla extract

3.5oz fat free cream cheese (little less than half an 8oz package)

1/4tap vanilla stevia drops

Pinch salt or sodium free salt

2tbs apple sauce (35g)

2tbs almond milk

Filling:

2tsp date sugar (12g)

2tbs caramel walden farms caramel or pancake syrup*

Water to thin

2tsp cinnamon

Filling directions: Combine all ingredients and add water until a pourable consistency is achieved. Set aside.

Directions for coffee cake:

Combine all dry ingredients together until well incorporated. Proceed to add all wet ingredients to the mixture and use a fork to mash the cream cheese throughout the mixture. Incorporate the cream cheese as thoroughly as possible throughout the batter leaving as little clumps as possible. Once the batter is well mixed; pour half into a well-greased loaf pan or 4x4inch ramekin lined with parchment paper. Next take your filling and spread evenly across the top of the batter. Proceed to cover the filling with the remaining batter.

Processed with VSCOcam with f2 preset   Processed with VSCOcam with f2 preset

(Bottom layer on left with a glimpse of filling mixture before spreading and middle filling on right)

Bake at 350deg F for 20-25min

The top will be puffed and browned and the middle will be set.

Processed with VSCOcam with f2 preset

Don’t worry! It’s not burnt!

Allow to cool In the Pan for 2-3min before transferring to a cooling rack.

Processed with VSCOcam with f2 preset

Macros for 1/4 of recipe: 127calories 12.5g carbs 12.5g protein 1.6g fat

*Notes: I used Jamie Eason’s vanilla whey with great success however feel free to substitute any other vanilla whey, however I cannot vouch for nutrition info or baking performance.

Also feel free to substitute the walden farms with maple syrup, honey, or agave, just note that this will change the nutrition information.